Thursday, August 30, 2012

Crazy Cake - Wacky Uncle Dave Bakes with the Kids

Pin It Now!


Now this would be a star on anyone's table!

Well, Jackie and I,  the famous empty nester's are entertaining this week.  It's been awhile since we have had kids in the house, and even longer since they left me in charge.

Aunt Jackie and her favorite Niece went early Christmas shopping.  Our favorite nephew-in-law, a plumber by trade, was fixing a broken toilet (less details the better).  So, wacky Uncle Dave got to spend the morning with Megan, Melanie and Matt (ages 7,6 and 4... and boy, is he ever 4).

As to the details on the cake, it's a box.  I used a Lemon box mix, one of those that has pudding all mixed in.  The icing is scratch (and one of the best ever), an orange buttercream...

2 cups powdered sugar
1 stick of butter, softened
2 TBS orange juice
the zest of 1 orange

The crazy look comes from using those new gel food colorings.  Don't be shy, use enough to get the bright almost neon looking colors.  The box I have only has 4 colors (red, yellow, blue and green).  The other colors were made from mixing different combinations.  Worked great (except the brown was supposed to be purple)...


It was very easy, just took a little time (which was the goal).  And, it was great fun.

Here's what the kids did...


We always start by washing our hands...


Matt did the mixing...
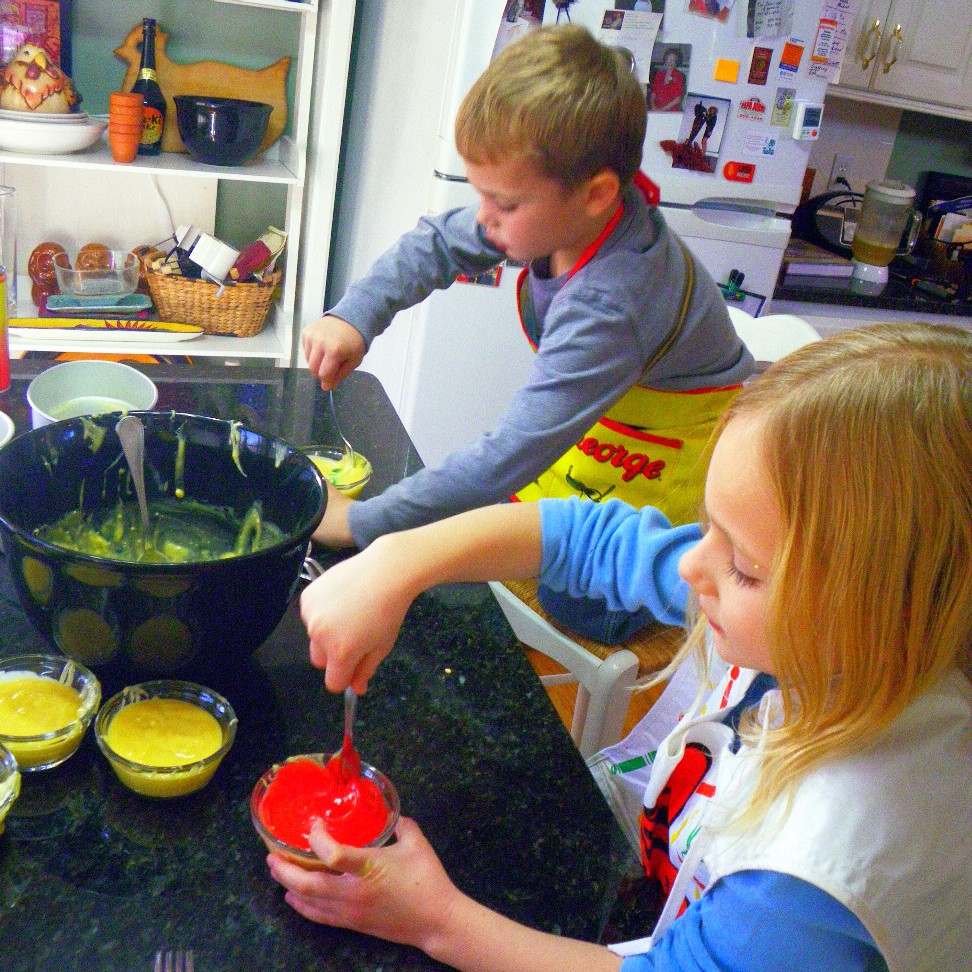

Then we divided the batter into 8 Mis en Place bowls and added the color gel.  Mix well.


And then just drop spoonfuls of each color into two greased pans.  Once the batter is dropped, be careful to not mix.  The colors did not mix, creating the wacky look.


While the cake was baking (see the box for directions), we learned about the cooks reward...


Licking the spoons!


Also, while it was baking, we mixed the icing and then cleaned the dishes so Aunt Jackie could really enjoy the cake.


A work of art!


And Aunt Jackie didn't have any idea what it would look like inside...


Oh, the giggles while she cut the cake!


And everyone loved getting our just desserts...

******************************************************

This simple recipe has been added to my growing list of "52 Cakes and Pies at Home"!

These are the desserts you make for your family.  No fancy amazing wedding cakes, just the rustic beauty of the classics.  From pumpkin pie to cheesecakes to layer cakes, these are what your family craves for dessert.  You may even see a few unusual crusts and frosting ideas to try.

You get the idea. These recipes are very simple, take very little time but will have your family wanting dessert first...

***********************PINTEREST*********************

Come and find me on Pinterest... Any of my "52 Ways to cook" Boards are worth following.  If you like this post, please take a second and "Pin" this to your own boards... Better yet, if you are part of a foodie group board please take a second and add this post to your group pins... best way to show your Love!

And BTW, if you are not yet part of a group board, drop me an email at Contact@eRecipeCards.com and request to be added to my group board... FAVORITE FOOD BLOGGERS! (be sure to include your pinterest ID when you write)  Once you are added, any pins you add will be seen by 10s of THOUSANDS of followers of the board (and growing daily).

Rules, only 2... 
  1. In order to join you need to start following the group board as well as at least one of my boards.
  2. And you must ONLY pin original sources, posts from food related bloggers only.  If you are a blogger, this is a great way to have thousands of potential readers see your work,  If you are a fan of bloggers, a great way to share your favorites...
    Come and be a part of ... FAVORITE FOOD BLOGGERS! on Pinterest

Tuesday, August 28, 2012

Semi Home Made Pumpkin Pie

Pin It Now!


"Look at me, I'm Sandra Lee, Lousy with Virginity"...


Am I the only person how hums that song from Grease every time I catch Sandra Lee's Semi-Homemade show on the Food Network?


Well, I like her TV show, but I prefer the challenges that go with not making semi-home-made.  But I had an emergency over Thanksgiving and this recipe worked perfect.  BTW, I actually adapted this from a recipe I read on the Mystery Lover's Kitchen blog, Julie Hyzy, author of the White house Chef murder mystery series (her new book in the series, Buffalo West Wing hits the stores in early January).  Other than the semi-homemade joke and the chance to put a show tune up on my blog, this recipe has nothing to do with Sandra Lee, or Sandra Dee or Virginity (or even Buffalo).


 But I digress...


My emergency...


My visiting family arrived late on Wednesday night, just hours before the Thanksgiving meal.  I asked my nieces and nephews what they most wanted to eat on Thanksgiving.  They all screamed for pumpkin pie.


I didn't know... As god as my witness, I just didn't know.  I also hadn't planned for a pumpkin pie.  There's stuff involved, pie crusts to be made, pumpkin to be broken down, ingredients I didn't have.


But, with a little "semi-homemade" help, I did have everything I needed to make this pie and make my nieces and nephews happy!


Here's what I did...


1 frozen pie shell
1 16 ounce can of Pumpkin (drained)
3 Eggs
2 tsp Pumpkin Pie Spice
2/3 cup Brown Sugar
2 cups Buttermilk
pinch Salt
2 TBS Butter, room temperature softened
  • Allow the pie shell to thaw to room temperature
  • Pre-heat oven to 425 degrees
  • Mix the dry ingredients, then the pumpkin and butter, then the eggs one at a time
  • Finally, add the Buttermilk and mix well
  • Bake for 10 minutes at the 425 degree temp to form a skin on the top of the pie
  • Reduce heat to 325 and bake for an hour 45 minutes.  Julie says her times vary from 1 hour to 2 hours.  You know when the pie is done when the skin cracks.  Mine took 1 hour 45 minutes.
I just love the extra little tang the buttermilk adds to the recipe.  With all the seasonings and flavors, it is very subtle.  Just a little something extra that separates your "semi-homemade" pie from a can and the freezer into something special.


The young'uns loved it.  It's good to have one of these "Semi-Homemade" recipes laying about for just such an emergency!

******************************************************

This simple recipe has been added to my growing list of "52 Cakes and Pies at Home"!

These are the desserts you make for your family.  No fancy amazing wedding cakes, just the rustic beauty of the classics.  From pumpkin pie to cheesecakes to layer cakes, these are what your family craves for dessert.  You may even see a few unusual crusts and frosting ideas to try.

You get the idea. These recipes are very simple, take very little time but will have your family wanting dessert first...

***********************PINTEREST*********************

Come and find me on Pinterest... Any of my "52 Ways to cook" Boards are worth following.  If you like this post, please take a second and "Pin" this to your own boards... Better yet, if you are part of a foodie group board please take a second and add this post to your group pins... best way to show your Love!

And BTW, if you are not yet part of a group board, drop me an email at Contact@eRecipeCards.com and request to be added to my group board... FAVORITE FOOD BLOGGERS! (be sure to include your pinterest ID when you write)  Once you are added, any pins you add will be seen by 10s of THOUSANDS of followers of the board (and growing daily).

Rules, only 2... 
  1. In order to join you need to start following the group board as well as at least one of my boards.
  2. And you must ONLY pin original sources, posts from food related bloggers only.  If you are a blogger, this is a great way to have thousands of potential readers see your work,  If you are a fan of bloggers, a great way to share your favorites...
    Come and be a part of ... FAVORITE FOOD BLOGGERS! on Pinterest

Friday, August 3, 2012

Sweet Potato Grits ala Bobby Flay

Pin It Now!

Said it before, say it again... Bobby Flay is a genius.

At the risk of offending my southern friends, grits just ain't that good. Just kind of bland. But, with a little effort, grits can be seasoned and flavored to be Very Very good. And with just a bit more effort, they can be extra ordinary.

Like these....

The recipe can be found in Bobby Flay's MESA GRILL COOKBOOK. According to his introduction for the dish, "I can see this as a Sunday dinner with the family, with the grits piled in the middle of the plate, surrounded by the shrimp. But the grits are so good, you could also serve them as a side dish for an elaborate meal." ...

Or a side dish for Thanksgiving dinner???

Here's what I did...

1 large Sweet Potato
2 TBS Canola Oil
1/2 Shallot, finely diced
4 cloves Garlic, smashed and minced
2 1/2 cups Chicken Stock
1 cup whole Milk
2 tsp pureed Chipotle Chile in Adobe Sauce
(yes, from the can, into the mini chopper to puree)
pinch Kosher Salt
1 1/2 cups quick cooking Grits
2 TBS Butter
3 TBS Honey
6 TBS Olive Oil
Fresh ground Black Pepper to taste


Preheat oven to 400 degrees
Roast the sweet potato in the oven until tender when pierced with a knife (about 45 to 60 minutes)
Peel the sweet potato and puree the flesh in a food processor (or mini chopper)
Heat the canola oil in a medium saucepan, add the shallot and cook until soft, 3 to 4 minutes. Add the garlic and cook for 30 seconds more.
Add the stock, milk, chipotle puree and salt... bring to a boil.
Slowly whisk in the grits. Reduce the heat to medium low and simmer for 10 minutes.
Stir in the sweet potato puree, stirring frequently for 5 to 10 minutes, until smooth and thickened.
Remove from the heat and whisk in the butter and honey to taste. Cover and keep warm.


Thursday, August 2, 2012

Farmers Market Chicken Salad

Pin It Now!

There is simply no better time to visit your local Farmer's Market than now.  Sure, there is a drought and news reports are talking about the worst crops in decades.  BUT, you will be amazed at the locally grown produce available.  There may be a few tomatoes with bad spots (great for making a big batch of marinara sauce).  And you may need to dig a little bit into the pile to find a dozen ears of sweet corn, but those ears are there (and most of the farmers will let you pull back a few husks away to look inside).  Local farmers want to sell you locally grown produce!

And here's a favorite recipe for fresh produce...

3 large boneless skinless Chicken Breasts, cooked, diced, about 4 cups
3/4 cup grapes, cut into quarters
1 medium Onion (about 3/4 cup), diced
1 medium Granny Smith Apple (about 3/4 cup), cored, peeled and diced
3/4 cup Bread and Butter Pickles (oddly enough, last week, at the Farmer's market, I bought a BUNCH of small cucumbers and made a batch of pickles)
1/4 cup chopped Cilantro
1/2 tsp White Sesame Seeds
1/2 tsp Black Sesame Seeds
1/2 tsp Salt
1/2 tsp Garlic Flakes
3/4 cup Mayonnaise

Mix well and serve.  Sometimes I like chunky salad (like the one pictured).  Sometimes I like a smoother mix.  To get the smoother mix I will put the chicken and mayo in a Kitchenaid mixer with the dough hook.  Add the spices and whirl away until the chicken blends mostly smooth.  Then I add the remaining ingredients and serve!


Monday, June 18, 2012

Chocolate Chip Cookie Dough Brownies ala Eats Well With Others

Pin It Now!

Genius... Pure genius

May be the best dessert I have had in a very long time.  Certainly my new favorite brownie recipe.  Layers of texture, layers of different chocolates... Well, I could go on, but this dessert is just as good as it sounds... better!

A quick history, one of my favorite bloggers is Joanne from the Eats Well With Others Blog.  Joanne is the total package, always a terrific read (like a dinner and a movie (well, recipe and a story) when you stop by her blog.  How on Earth she has the time as in addition to consistently restaurant quality meals, in her spare time she is also a medical student in NYC studying to save the world.  Worth the read for her stories...

And more than every so often, she gives me something like this that I just had to make...

A little bit of history for this recipe, I found it on Joanne's blog (click HERE for her post, MUCH better photos and story than you will read here).  But it originated in a new cookbook, written and photographed by a new favorite blogger, Lindsey from the Love & Olive Oil blog.  Yeap, one of us... Food blogger... One of them... Cookbook author!!!

AND WHAT A COOKBOOK!!!

The Cookie Dough Lover's Cookbook!  Honest, not just a cookie recipe book, but TONS of uses for this gift of the food gods (including many with my favorite, raw cookie dough (no eggs)...  Here's what Amazon.com has to say about Lindsey's book...
Food blogger Lindsay Landis has invented the perfect cookie dough. It tastes great. It’s egg free (and thus safe to eat raw). You can whip it up in minutes. And, best of all, you can use it to make dozens of delicious cookie dough creations, from cakes, custards, and pies to candies, brownies, and even granola bars. Included are recipes for indulgent breakfasts (cookie dough doughnuts!), frozen treats (cookie dough popsicles!), outrageous snacks (cookie dough wontons! cookie dough fudge! cookie dough pizza!), and more.


Now, Joanne got an advance copy of the book, as well as permission to post the recipe.  I got neither.  But I have a link to Joanne's recipe page where you can find this recipe... Click the blue letters...


But in typical inspired by tradition, I made a few tiny adjustments...

First, I upped the ante a bit by taking 1 tsp of water and mixing that with a tsp of instant coffee and adding this to brownie mixture.  I am going to guess that the tiny amount of extra liquid was enough to make my brownies more fudgy than the fudgy yet cake like texture of Joanne's brownies.  Mine lost a bit of presentation as Joanne's had equal size layers of brownie and cookie dough.  Mine had about half the size of brownie compared to the larger size of dough.

But that was more than OK, I like a fudgy brownie.
I also added some white chocolate chips to the brownie.

A) I know that there is no actual chocolate in white chocolate chips, but I like 'em... sue me.

And 2) I like the extra look of the dark chips that are in the cookie dough layer and the white chips in the dark brownie layer.

Next time I make this recipe I am going to double the brownie layer recipe so my 2 layers are equal size and look pretty.  But as I have been saying... My oh my these were good.

Last change I made was to use a darker chocolate, already infused with coffee beans.

I am a big fan of Green & Black's Organic Dark Chocolate infused with Arabica coffee beans and I use this brand of chocolate a lot.  Just a hint of the Earthy taste that pairs fabulously with chocolate.

But that's it... just a few changes to an already perfect recipe!

There are no eggs in the "raw" layer of cookie dough, so no need to worry about killing your family.

So, thanks Joanne, terrific introduction to a new blogger and a terrific recipe... As a reminder...
 Joanne got an advance copy of the book, as well as permission to post the recipe.  I got neither.  But I have a link to Joanne's recipe page where you can find this recipe... Click the blue letters...


Now I am heading off to buy the book!

Friday, June 8, 2012

Honey Bourbon Sriracha Sauced Fried Grilled Chicken Wings

Pin It Now!

Ah... The illusive "Perfect" Chicken Wing...  So many options for toppings, so many options for styles of cooking (fried, baked, grilled... I even read a blogger's "perfect wing" recipe that was microwaved... but I digress).

I have to admit I am a chicken wing addict.  When the perfect balance of heat spices and sweet sauces combine with sticky and crispy texture, I am in heaven.  I could eat em by the dozens.

The quest for perfection will be a never ending journey I suspect.  But what a ride.  For me, right now, at this point in my life, these are my current version of the perfect chicken wing...

Heat from the gift of the food gods, Sriracha Sauce
Sweet from Honey
An Earthy bite from the Bourbon.

Fried with a simple thin layer of breading to insure juicy chicken
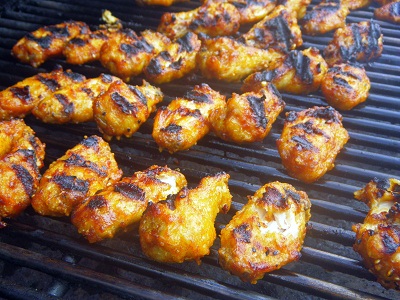
Grilled to achieve a crispy texture while still maintaining that glorious gooey wet sauce!

To quote Ira Gershwin... Who could ask for anything more???

 First thing I did was to flour the wings.  Flour only, no egg.

Simple enough...
Big plastic bag
Big scoop of flour
Big scoop (about 1/3rd cup) of my ubiquitous salt substitute, SODOM and GOMORRAH (equal parts Course grain Salt, Garlic Flakes and Black and white Sesame Seeds)

Add chicken, shake.

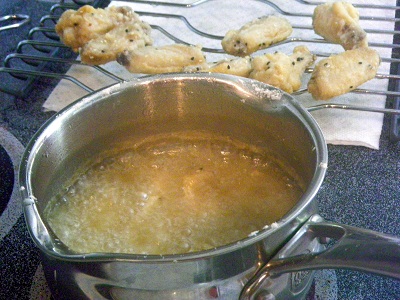
 Next I fried em.

Canola Oil works best, higher burn temperature.  Peanut oil is also a great option.  I was most of the way through the process when I realized I was low on oil.  SO I made these in a small sauce pan with just enough oil to cover the wings (about half way up the side).  So I worked in batches.

Heat the oil to 360 degrees.
Cook ONLY for 6 minutes.  Just long enough to insure they are cooked through.  If you have unusually large drumettes, add a minute.  If you are cooking the smaller wing portion, knock it down to only 5 minutes.  but 6 minutes is the general rule of thumb.

 While these are cooking, make up your sauce...

1/4 cup Honey
1/4 cup Soy Sauce
1/4 cup Whiskey (Bourbon if it comes from Kentucky)
Sriracha hot sauce to taste (I used 1 TBS).  Add more if you like them HOT... less if you want a hint of heat.
1 TBS Ground Ginger

Whisk until well combined.  Go ahead and taste test.  add more sriracha if you like, more honey if you added too much.


 Time to sauce the wings.

Dip and coat well.  At this stage, you could simply serve as is.  Most of the time when you order wings at a bar this is how they are served, fried and then sauced.

Me... I add an extra step... Grilling the already cooked wings to add an extra texture... crispy patches of skin and heating up the sauce.


Serve em while they are hot and wish you made more, they will go quick!

Tuesday, June 5, 2012

Mascarpone Cheesecake with a Mango Sauce

Pin It Now!

Oh Sigh...

I forgot... I was busy... I was caught up in the British Diamond Jubilee fever... Who knows, but bottom line, I did not take any "in-progress" cake prep photos, nor a photo of the whole pie.  Much as the above shot is OK, I just do not feel it is worthy of this incredible dessert.  AND IT IS INCREDIBLE!!!

I wanted to give mascarpone cheese a try in the cake.   Also most recipes call for a bit of flour added to make the thick texture of a great NY style cheesecake.  I was after a lighter, fluffier cake and it all came off without a hitch!

And the real treat was the mango sauce topping.

Very simple to make, a fresh mango, peeled and pitted (wish that was easier to do).  Then I took about half of it, chopped it and heated in a sautee pan over medium heat.  I added a couple TBS of sugar, one tsp of lemon juice and continued to break down the fruit over the heat.  In about 10 minutes everything is cooked, soft and smells wonderful!

I added heavy cream to make the sauce, started at 1/4 cup and added a TBS at a time to get the right consistency.  Finally I ran the sauce stuff through a food processor to get the smooth, creamy, saucy look and texture.

And since I was grilling for the meal, I grilled a few pineapple slices sprinkled with brown sugar and soaked in rum!


First, the history lesson (with thanks to WhatscookingAmerica.net)...
New York cheesecake is the pure, unadulterated cheesecake with no fancy ingredients added. It is made with pure cream cheese, cream, eggs, and sugar. Everybody has a certain image of New York Style Cheesecake. According to New Yorkers, only the great cheesecake makers are located in New York, and the great cheesecake connoisseurs are also in New York. In the 1900s, cheesecakes were very popular in New York. Every restaurant had their version. I believe the name "New York Cheesecake" came from the fact that New Yorkers referred to the cheesecakes made in New York as "New York Cheesecake." New Yorkers say that cheesecake wasn't really cheesecake until it was cheesecake in New York.
1929 - Arnold Reuben, owner of the legendary Turf Restaurant at 49th and Broadway in New York City, claimed that his family developed the first cream-cheese cake recipe. Other bakeries relied on cottage cheese. According to legend, he was served a cheese pie in a private home, and he fell in love with the dessert. Using his hostess’ recipe and a pie she made with ingredients he provided, he then began to develop his own recipe for the perfect cheesecake. Reuben soon began to serve his new recipe in his Turf Restaurant, and the cheesecake quickly became very popular with the people who frequented Reuben’s Broadway restaurant.
That wasn't so bad.

And now the soapbox editorial...
One of the great sins of the culinary world is the box, no-bake cheesecake.  the sin is not that they exist, the sin is in the name.  Call those no bake things whatever you like, but set them side by side with one of these beauties and you will understand.  Speed, efficiency, the hint of something special, all make sense.  But, I guess I understand, no one would buy them if they were called Faux Cheesecake.
A couple of notes...

If you've never made one of these, a word of warning.  They are incredibly easy, but the baking process is several HOURS.  Don't try to cut the time down.  It's part of the baking process to bake for an hour and 10 minutes, then allow it to continue baking while the oven is off and cooling for the next 5 hours (about the time for the inside of the oven to reach room temperature).  As in most things in life, good things come to those who wait.

And finally, this can be an expensive cake to make.  2 bricks of cream cheese and 2 tubs of Mascarpone can be expensive.  But, follow the sales in your store.  I saw Philadelphia Brand Cream Cheese on sale this week for 69 cents a brick.  Sale time is the only time I make this.
Alright, enough delay...

Here's what I did...

For the Crust, 
10 Cinnamon Graham Crackers
3 TBS Butter, melted
For the Filling,
2 8oz. tubs of Mascarpone Cheese
2 8oz. packages of Cream Cheese
1 1/2 cups Sugar
3/4 cup Heavy Cream
4 whole Eggs
1 cup Sour Cream
1 tablespoon Real Vanilla 
  • Preheat oven to 350 degrees
  • Grease a 9-inch spring-form pan. 
  • In a medium bowl, mix graham cracker crumbs, or, I used my food processor to make the crumbs, with melted butter
  • Press onto the bottom of the pan using the bottom of a glass or measuring cup.  
  • Only  press the crust up about half way.  Part of the appeal of a NY Style Cheesecake is the unevenness of the crust (go back and look at that very first photograph)
  • Onto the filling...In a large bowl, mix mascarpone and cream cheese with sugar until smooth. 
  • Blend in cream, and then mix in the eggs one at a time, mixing just enough to incorporate. 
  • Mix in the sour cream, vanilla until smooth. 
  • Pour filling into prepared crust.
  • Bake in preheated oven for 1 hour. 
  • Turn the oven off and let cake cool in oven with the door closed for 5 to 6 hours. 
  • Chill in refrigerator until serving.
As I said, for a denser, more traditional style NY Cheesecake, add 1/4 cup of flour.  This was a delightful change of pace texture that was INCREDIBLY well received.  Everyone LOVED it!  A real winner.


FMP