Showing posts with label 13 Bread Machine BREADS. Show all posts

Sunday, October 23, 2016

Poppy Seed Hot Dog Buns Honey Wheat Bread BREAD MACHINE EASY

Pin It Now!

Oh Boy, fresh made Hot Dog Buns...

But not just any hot dog buns, these are Poppy Seed Hot Dog Buns, an essential ingredient for making a classic Chicago Style hot Dog...

A perfect storm of combinations of ingredients (Poppy Seed Bun, All Beef Hot Dog, Onions, Tomatoes, Sports peppers, Tomatoes, Sweet Pickle relish and Mustard (Never ever ask for ketchup on a Chicago Dog.

A perfect combination of ingredients, much like the National League pennant champion Chicago CUBS of 2016!!!

GO CUBS GO...

World Series parties would not be complete without a Chicago Dog... Complete with these poppy Seed Hot Dog buns made easy in a Bread machine.  The machine does all the work for you, mixing, kneading and even setting the right temperature for the first rise, getting the yeast to do it's thing.

About the only tricky part is to get the shape.  You can either make full size buns (the center four buns in the photo), or what I prefer for a party are half size buns... Hot Dog Slider size Buns!

To get the shape, divide the dough into 8 (or 16) equal size pieces.  Then line them up with 1 inch separating them.  During the second rise, the buns will touch.  I like to bake my slider buns in standard size bread loaf pans.  same rules, 1 inch separation and they also rise to touch.. Do an egg wash, sprinkle the seeds and bingo bango bongo... Poppy Seed buns for your Cubs victory party!

Go Cubs Go indeed and ENJOY!  The Cubs haven't been here since the day we dropped the bomb on Japan.  Who knows when we will pass this way again.


 OK... Here's what I did...

Honey Wheat Bread
BREAD MACHINE EASY

Ingredients
  • 1 Cup plus 2 TBS Warm (100 degrees) 2% Milk
  • 2-1/2 Cups White Bread Flour
  • 1/2 Cup Wheat Flour
  • 1-1/2 TBS Powdered Milk
  • 2 TBS Honey
  • Large pinch Salt
  • 2 TBS Butter
  • 1 package (2-1/4 Oz) Bread Machine Fast Acting Yeast
  • 1 Egg for egg wash
  • 4 tsp Poppy Seeds
Cooking Directions
Set your bread machine to the "Dough" setting. This recipe makes 8 Full Size or 19 Slider size "mini" buns.
  1. Put all of the ingredients in the machine in the order listed. NOTE: be sure to warm the milk slightly to about 100 degrees but NO HOTTER than 120. I microwave mine for 30 seconds.
  2. Run the machine according to manufacturer's instructions. Meanwhile prepare the loaf pan(s) with nonstick spray.
  3. When the machine has run it's course, the dough should be rising, double in size. Remove from the machine box and knead for just a minute. You may need to add a sprinkle of flour if the dough is too sticky.
  4. Preheat the oven to 350 degrees. 
  5. For full size Hot Dog Buns, Form the dough into a ball.  Divide into 8 even sized pieces.  Roll each piece into a tube shape.  Place side by side, about one inch apart on a Silipat or parchment paper lined cookie sheet.  During the second rise the buns will expand into each other.  Alternatively, cut each of the eight pieces in half, forming 16 tubes for half size Hot Dog Slider size buns (my favorite for parties).  Repeat side by side instructions or alternatively line them up 4 in a Bread loaf pan (4 loaf pans).  Just the right size for hot dog slider buns.
  6. Set on top of the oven, cover with a towel and allow the bread to rise a second time for 20 minutes.  
  7. Make an egg wash, simply whip an egg and brush onto the top of each bun,  Sprinkle a bit of Poppy seeds on top of the wash.  Slice the top of each bun about 1/2 way through. 
  8. Move to the oven and bake for about 25 minutes (only 20 minutes if you are using the mini loaf pans).
  9. Allow to cool in the pans for 30 minutes before removing and serving.
  10. Serve with hot dogs and enough toppings to make an authentic Chicago Hot Dog and ENJOY!

Saturday, October 8, 2016

Cheddar Cheese Mustard Swirl Honey Wheat Bread BREAD MACHINE EASY - Photo DIY Essay

Pin It Now!

 Oh Boy Fresh Made Bread...

But not just any fresh made bread, this has such an incredible presentation.  Beautiful stunning presentation with the swirled braided look on top.  But the star of the show is the swirl center with ribbons of cheese throughout.

Such a a winner.

I like to use a wheat dough recipe (with honey) for this recipe.  Adds a little extra strength to the dough to hold up to all the extra moisture added with the cheese and mustard.

This is very easy to do.  Just takes a little know how.  So, here's a photo essay to give you that know how...


First, run the bread machine (keep scrolling down for the easy to follow recipe).

On a lightly floured surface, roll the dough out to a large rectangle...

 Next, slather the Mustard evenly on top of the rectangle of dough.
 Then Sprinkle the cheese on top of the mustard.
 And then roll the dough up tight to form a long tube.
 Now, Slice the tube lengthwise.  Some of the cheese will spill out.  Just tuck it back in.
 Start your braid look.  Put half the tube on top of the center of the other half (Open part on top of each half).
 And just tuck under both half until you have a braid
 Cut in half, put each half into a prepared bread loaf pan.
 Put in a warm dry spot, cover with a towel and allow a second rise for 1 hour, until the dough has risen double.
Bake in a preheated 350 degree oven for 25 minutes.  Allow to cool in the pans for 20 minutes before removing and slicing.

And that's it... easy peasy, spectacular, fun presentation and DELICIOUS!

Keep scrolling down for the easy to follow recipe.


 OK... Here's what I did...


Cheddar Cheese Swirl
Honey Wheat Bread
BREAD MACHINE EASY


Ingredients
  • 1 Cup plus 2 TBS Warm (100 degrees) 2% Milk
  • 2-1/2 Cups White Bread Flour
  • 1/2 Cup Wheat FLour
  • 1-1/2 TBS Powdered Milk
  • 2 TBS Honey
  • Large pinch Salt
  • 2 TBS Butter
  • 1 package (2-1/4 Oz) Bread Machine Fast Acting Yeast
  • FOR THE CHEDDAR MUSTARD SWIRL
    1/4 Cup Plus an additional 1/4 Cup Whole Grain Mustard
  • 1 Cup Plus an additional 1 Cup Cheddar Cheese
Cooking Directions
  1. Set your bread machine to the "Dough" setting. This recipe makes 2 swirled loaves.
  2. Put all of the ingredients in the machine in the order listed. NOTE: be sure to warm the milk slightly to about 100 degrees but NO HOTTER than 120. I microwave mine for 30 seconds.
  3. Run the machine according to manufacturer's instructions. Meanwhile prepare the loaf pan(s) with nonstick spray.
  4. When the machine has run it's course, the dough should be rising, double in size. Remove from the machine box and knead for just a minute. You may need to add a sprinkle of flour if the dough is too sticky.  Prepare 2 standard size loaf pans with non-stick spray
  5. Divide dough into 2 equal pieces.  On a floured surface, roll the first dough ball into a flat rectangle, about 12X24 inches.
  6.  Spread the first 1/4 Cup Mustard evenly over the flat bread dough.  Then sprinkle the first 1 cup cheese just as evenly over the mustard.
  7. Roll the dough into a log starting with the short end – picture rolling a jelly roll. Pinch the seam.
  8. Slice the roll in half the entire length of the roll and face the cut sides up as best you can. Cheese will spill out – just tuck it back into place.
  9. Pinch the farthest end from you. Carefully bring the piece on the left side over the piece on the right side. Repeat, completing the twist. Pinch the end closest to you.
  10. Carefully transfer the twist into your prepared loaf pan.
  11. Repeat with second dough ball.
  12. Preheat the oven to 350 degrees. Transfer the loaf pan(s) to the top of the oven, cover with a towel and allow the bread to rise a second time for 1 hour.
  13. Move to the oven and bake for about 25 minutes.
  14. Allow to cool in the pans for 30 minutes before removing and slicing.
  15. Serve Warm and ENJOY!

Thursday, September 29, 2016

Rosemary Sea Salt Applesauce Rolls for Slider Buns

Pin It Now!

Oh Boy Dinner Rolls...

But not just any dinner rolls... These are amazing.  Stunning presentation, beautiful colors and an extra strong punch of Sea Salt and Earthy Herbal Rosemary.

What's not to love!

These make an especially wonderful Slider Bun.

Adds LOTS of presentation appeal to a simple sandwich, making the simple STUNNING!

And the applesauce adds plenty of extra flavor and moisture, guaranteeing a moist and tender roll.  And best of all, Bread Machine easy.  Letting the machine do all the hard stuff (kneading, mixing and first rise.

Like I said... What's not to love... ENJOY!


 OK... Here's what I did...

Rosemary Sea Salt
Applesauce Rolls for
Slider Buns

Ingredients
  • 3/4 Cup Luke Warm Water Milk
  • 2 Packages Instant Bread machine Yeast
  • 1 tsp Sugar
  • Additional 1/2 Cup Sugar
  • 2 Eggs, slightly beaten
  • Pinch Salt
  • 6 TBS Butter, Melted
  • 3 TBS Rosemary, chopped
  • 1 Cup Applesauce
  • 4-1/2 Cups Flour
  • FOR GARNISH -
    1 Large Egg, whipped  for an egg wash.
  • 2 TBS Coarse Grind Sea Salt
    2 TBS Fresh Rosemary Chopped 
Cooking Directions
  1. First, Mix the warm (not too hot) Milk with the sugar and yeast.  Allow to sit for 5 minutes, you will see the yeast start to bloom.
  2. Next, In the bowl of the bread machine, add all of the ingredients in the order listed (Except the last three "Garnish" Ingredients)..
  3. Set your machine to the "DOUGH" setting and allow the machine to do all of the mixing, kneading and rising. About an hour and a half total.
  4. When the machine is done, Pull the dough from the bowl. Form into the size of a ball. Cut this ball in half, creating 2 pieces. Take one of the pieces, form into a smaller ball and cut those in half, forming 4 pieces. Form those four pieces into balls and then cut each of those into FOUR pieces each, making a total of 16 pieces.  Repeat with second half to form a total of 32  pieces  Form each of those 32  into balls.  Gently press each ball to form a flat biscuit shape.
  5. After the hour, brush each roll with the egg wash.
  6. Preheat oven to 375 degrees.
  7. Spray two  9X13 Casserole pans with non-stick spray.arrange 16 balls in each dish.
  8. Allow a second rise, cover each pan with a tea towel and set in a warm place (I just set on top of the preheating oven).  All this rise for 1 hour, until the dough doubles in size.
  9. Do an egg wash (1 Egg, whisked then brushed over the top of the rolls). Then sprinkle a bit of Extra Course (Large Granular pieces of) Sea Salt and an equal amount of Chopped Rosemary on each ball.
  10. Bake uncovered for 20 minutes.  Allow to cool in the pan for 5 minutes.  Remove from pan, separate and store in a sealed container 
  11. Serve Warm to room temperature and ENJOY!

Friday, September 23, 2016

Pumpkin Dinner Rolls with Rosemary and Sea Salt Makes Great Slider Buns Bread Machine Easy

Pin It Now!

 OH BOY ... Dinner Rolls made easy in a Bread Machine...

But not just any dinner rolls, these are AMAZING!  hints of fall in the air when you bake these with the aroma of a Pumpkin Pie.  Soft and moist with so many extra flavors.  Herbal Rosemary, Savory Sea Salt and of course the Pumpkin.

These are hands down, my very favorite dinner roll of all time.

And they are all made easy in a bread machine.  I probably spent a total of 10 minutes (maybe 15) HANDS ON cooking time.  The rest, the bread machine does all of the hard work.  Mixing, first rise, kneading.  The dough comes out ready to cut into 30 roll shapes, allow a second rise and ready to bake,

Just that easy.

And an incredible payoff that will make any meal memorable.

AND BTW, they make amazing Slider Buns too!

ENJOY


 OK... Here's what I did...


Pumpkin Dinner Rolls
With Rosemary Sea Salt
Bread Machine EASY


Ingredients
  • 3/4 Cup Luke Warm Water Milk
  • 2 Packages Instant Bread machine Yeast
  • 1 tsp Sugar
  • Additional 1/2 Cup Sugar
  • 2 Eggs, slightly beaten
  • Pinch Salt
  • 6 TBS Butter, Melted
  • 3 TBS Rosemary, chopped
  • 1 Cup Canned Pumkin Pie Mix
  • 4-1/2 Cups Flour
  • FOR GARNISH -
    1 Large Egg, whipped  for an egg wash.
  • 2 TBS Coarse Grind Sea Salt
    2 TBS Fresh Rosemary Chopped 
Cooking Directions
  1. First, Mix the warm (not too hot) Milk with the sugar and yeast.  Allow to sit for 5 minutes, you will see the yeast start to bloom.
  2. Next, In the bowl of the bread machine, add all of the ingredients in the order listed (Except the last three "Garnish" Ingredients)..
  3. Set your machine to the "DOUGH" setting and allow the machine to do all of the mixing, kneading and rising. About an hour and a half total.
  4. When the machine is done, Pull the dough from the bowl. Form into the size of a ball. Cut this ball in half, creating 2 pieces. Take one of the pieces, form into a smaller ball and cut those in half, forming 4 pieces. Form those four pieces into balls and then cut each of those into FOUR pieces each, making a total of 16 pieces.  Repeat with second half to form a total of 32  pieces  Form each of those 32  into balls.  Gently press each ball to form a flat biscuit shape.
  5. After the hour, brush each roll with the egg wash.
  6. Preheat oven to 375 degrees.
  7. Spray two  9X13 Casserole pans with non-stick spray.arrange 16 balls in each dish.
  8. Allow a second rise, cover each pan with a tea towel and set in a warm place (I just set on top of the preheating oven).  All this rise for 1 hour, until the dough doubles in size.
  9. Do an egg wash (1 Egg, whisked then brushed over the top of the rolls). Then sprinkle a bit of Extra Course (Large Granular pieces of) Sea Salt and an equal amount of Chopped Rosemary on each ball.
  10. Bake uncovered for 20 minutes.  Allow to cool in the pan for 5 minutes.  Remove from pan, separate and store in a sealed container 
  11. Serve Warm to room temperature and ENJOY!

Thursday, September 15, 2016

Garlic Parmesan Artisan Bread - Bread Machine Easy

Pin It Now!

 Oh Boy - Fresh made Bread!!!

But not just any Fresh made Bread... This loaf has that wonderful look of Artisan Bread.  But best of all is the extra flavors of plenty of Garlic (once baked, the garlic retains it's Earthy flavor while adding sweetness to the bread); PLUS the nutty flavor of baked Parmesan Cheese.

For extra presentation, I added a coating of one of my favorite spice mixes, what I call Sodom and Gomorrah low salt alternative (equal parts Black and white Sesame Seeds, along with garlic flakes and coarse ground Sea Salt).  Adds a beautiful dark crust (the egg wash that cements the spices to the bread gets a beautiful dark coloring), the beautiful look of sesame seed buns, PLUS those flavors!  Hints of Asian Sesame, the punch of Earthy Garlic and the extra delight of Salt on the crust.  Makes you want to lick the top.

I love this bread with just a little butter, but it is also wonderful for a sandwich bread.  Nice tight crumb that will hold up to the stuffings.  Like this Sriracha spicy Meat Loaf with an extra punch of Sriracha Ketchup  (come back tomorrow for my next two recipe posts)!

And best of all of course is the ease... As with most Bread Machine recipes, 10 minutes of actual hands on work and you have the machine do all the work (mixing, kneading, first rise) makes this a NEVER FAIL recipe that will indeed "Dress to Impress" any lunch party.

Get ready for the Ooohs and Aaahs and of course...
ENJOY!


 OK... Here's what I did...

Garlic Parmesan Artisan Fresh Baked Bread

Ingredients
  • 1 Cup Warm (110 degrees)  Milk
  • 2 TBS Honey
  • 1/3 Cup Garted Parmesan Bread
  • 2 TBS Garlic Powder
  • 1tsp Salt
  • 3 Cups Bread Flour Flour
  • 1/4 Cup Sugar
  • 1 Package (2-1/4 tsp) Bread Machine Yeast
  • Optional, for the Sesame Seed "Garnish"...
    1 TBS Black Sesame Seeds
  • 1 TBS White Sesame Seeds
  • 1 TBS Garlic Flakes
  • 1 TBS Course Grain Sea Salt
  • 1 Large egg, whipped for egg wash
Cooking Directions
  1. Warm the Milk.  I put the milk into the microwave for about 40 seconds.  Check to see if it is ... Not too hot, not too cold... Just right, slightly above room temperature
  2. Add all the ingredients to the bowl of your bread machine.  Use the "DOUGH" setting and all ow the machine to work (Mix, Knead and first Rise).
  3. When the cycle has finished, form into a ball. Don't work the dough too much, just enough to shape into round. Spread a thin layer of cornmeal on baking pan (or use a non-stick Silipat or parchment paper. Place round on the pan and cover with thin towel to let rise in non-drafty area for about an hour.
  4. Preheat oven to 375 degrees... Check the rise, be sure the Bowl shape has formed and they have risen, doubling in size.  Allow additional rise time if needed.
  5. Note: if doing the spice mix topping, skip this step...
    Lightly brush the dome with melted butter.  Cut a Tic Tack Toe Board into the top.  Cover the baking sheet with a tea towel and set in a warm draft free part of your kitchen.  Allow a second rise for about 30 minutes.
  6. FOR THE OPTIONAL SESAME SEED "GARNISH"... Brush the egg all over the dome.  Sprinkle the Sesame Seed mix of garlic flakes, black and white sesame seeds and sea salt.  Brush with a second layer of egg wash.  Cover the baking sheet and bread dough dome with a tea towel and set in a warm draft free part of your kitchen.  Allow a second rise for about 30 minutes.  NOW, after the second rise, Cut a Tic Tack Toe Board into the top.  
  7. Once the oven has pre-heated and your bread dough dome has risen, bake for 25 minutes until the top is a deep golden color.
  8. Set the bread on a rack to cool, brush the top again with melted butter for extra shine.
    Serve warm with butter or make a sandwich

    and .... ENJOY!

Sunday, September 4, 2016

Bread Bowl for Soup Made Easy in a Bread Machine

Pin It Now!

 OH BOY!!!  A specialty Bread made easy in a Bread Machine!

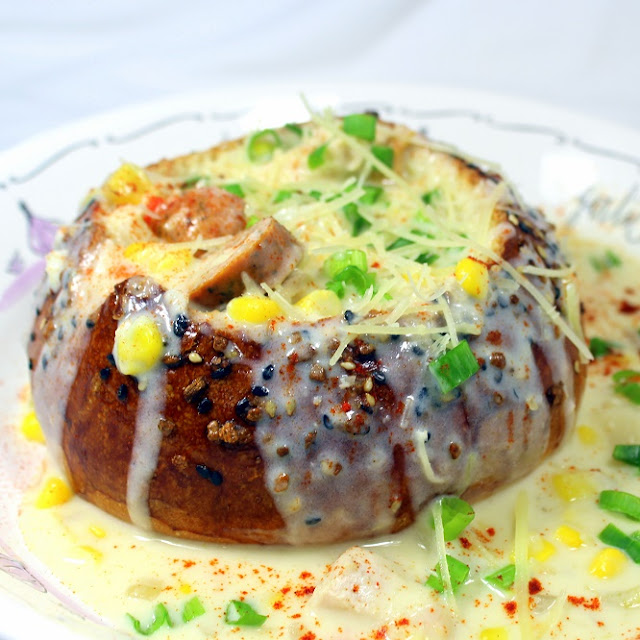
But not just any specialty bread, here's the recipe for those wonderful presentation "bowls" perfect for a nice thick soup, stew or as in these photos a chowder (Come back tomorrow for that recipe).

Breads meant for a bread bowl are slightly different from most breads that I make in my beloved bread machine.  I want a dense heavy bread that will hold up to the moisture in a soup.  Nothing worse than to add the soup and the bowl disintegrates into mush.

This recipe creates a bowl that will stay solid, absorb some of the moisture, yet will still retain it;s shape and accent the flavor/texture of the soup without that mushy texture.

And this recipe indeed does all that!

A couple of notes about the look.  I like to bake these at a slightly higher temp (375 instead of 350).  Along with the higher temp, I do an egg wash (or butter wash) that adds a shell or crispiness around the bowl.  Again, no mush.

I also like the look and flavor that the sesame seeds add.  I actually add an even stronger flavor with an even mix of white sesame seeds, black sesame seeds, garlic flakes and coarse grain sea salt.  The egg was is even more important then to insure all those fixins stick to the bowl.

These are VERY easy to make and will add a tremendous presentation to any of your soups!  Beautiful look, fantastic flavors added to your soup and an almost crunchy texture...

Enjoy Indeed!


 OK... Here's what I did...

Bread Bowl for Soup
Made Easy in a
Bread Machine

Ingredients
  • 1-1/4 Cup Warm (110 degrees)  Milk
  • 1 Package Bread Machine Yeast
  • 1/4 Cup Sugar
  • 1 Large Egg
  • 2 TBS Butter
  • 3 Cups All Purpose Flour
  • 1 tsp Salt
  • 3 TBS Butter (Softened to room temperature)
  • Optional, for the Sesame Seed "Garnish"...
    1 TBS Black Sesame Seeds
  • 1 TBS White Sesame Seeds
  • 1 TBS Garlic Flakes
  • 1 TBS Course Grain Sea Salt1 Large egg, whipped for egg wash
Cooking Directions
  1. Warm the Milk.  I put the milk into the microwave for about 40 seconds.  Check to see if it is ... Not too hot, not too cold... Just right, slightly above room temperature
  2. Add all the ingredients to the bowl of your bread machine.  Use the "DOUGH" setting and all ow the machine to work (Mix, Knead and first Rise).
  3. When the cycle has finished, form into a ball and cut into 4 equal sizes. Don't work the dough too much, just enough to shape into rounds. Spread a thin layer of cornmeal on baking pan (or use a non-stick Silipat or parchment paper. Place all four dough rounds on pan and cover with thin towel to let rise in non-drafty area for about an hour.
  4. Preheat oven to 375 degrees... Check the rise, be sure the Bowl shape has formed and they have risen to bowl height.  Allow additional rise time if needed.
  5. Lightly brush each bun with melted butter.  Cut an "X" into the top of each bowl.  Cover the baking sheet with a tea towel and set in a warm draft free part of your kitchen.  Allow a second rise for about 30 minutes.
    FOR THE OPTIONAL SESAME SEED "GARNISH"... Brush the egg was over the sides of each bowl.  Sprinkle the Sesame Seed mix of garlic flakes, black and white sesame seeds and sea salt.  Brush with a second layer of egg wash.  Cut an "X" into the top of each bowl.  Cover the baking sheet with a tea towel and set in a warm draft free part of your kitchen.  Allow a second rise for about 30 minutes.
  6. Once the oven has pre-heated and your buns have risen, bake for 20 minutes until the tops are a deep golden color.
  7. Set them on a rack to cool, brush the tops again with melted butter.
    For the bowls, cut a thin layer across top and hollow out to about 1/4-1/2 inch in thickness. Fill with your favorite chili, chowder, or stew.... ENJOY!

Tuesday, May 31, 2016

Brioche Hamburger Buns from a Bread Machine - 52 Secret Grilling Time Extras

Pin It Now!

 I love Bread!

And bread machines are god's gift to bread lovers.  Only a few minutes hand on work (maybe 10 minutes total), a couple of hours of sitting around (or doing other prep work) and viola... fresh baked bread.

This recipe is for that eggy, extra rich (extra butter and an egg in the recipe) bread called a Brioche bread.

Soft and moist with a beautiful crumb.  The tops plump up nicely for that classic dome shape with a golden brown and delicious coloring.

The machine does all of the work, mixing, kneading and setting the right environment for that first rise.  Makes this a fool proof easy to duplicate recipe.  Making these buns a perfect compliment to your burgers,,,

Enjoy indeed!

 OK... Here's what I did...

Brioche Hamburger Buns from a Bread Machine

Ingredients
  • 1-1/4 Cup Warm (110 degrees) Water
  • 2 TBS Malted Milk Powder
  • 1 Package Bread Machine Yeast
  • 2-1/2 TBS Sugar
  • 1 Large Egg
  • 3 Cups Bread Flour
  • 1/3 Cup Whole Wheat Flour
  • 3 TBS Butter (Softened to room temperature)
Cooking Directions
  1. Add all the ingredients to the bowl of your bread machine.  Use the "DOUGH" setting and all ow the machine to work (Mix, Knead and first Rise).
  2. When the cycle has finished, form into a ball and drop onto a lightly floured surface.  Divide into 8 (large Buns) or 12 (Average sized) or 16 (Slider size) pieces.
  3. Shape each piece into a ball,  Evenly space each ball on a baking sheet lined with parchment paper.  Press each ball flat, about 1 inch thick.
  4. Lightly brush each bun with melted butter.  Cover the baking sheet with a tea towel and set in a warm draft free part of your kitchen.  Allow a second rise for about 30 minutes (each bun will puff up about 2 inches tall with a nice rounded top.
  5. Meanwhile, preheat your oven to 400 degrees.  Set a 9X13 casserole pan with 1 inch of water in the bottom rack.  Once the oven has pre-heated and your buns have risen, bake for 17 minutes until the tops are a deep golden color.
  6. Set them on a rack to cool, brush the tops again with melted butter.
    Slice and serve with the burger of your choice and of course... ENJOY!

Double Click the Photo above for
my GROWING list of HUNDREDS
of BBQ Recipes
So,  I am pleased to list this as one of my Growing list of  "52 Grilling Time Secret Extras" or "52 Ways to Cook BBQ and Grilling Recipes"!!!

Well over 52 recipes actually as I just can't stop... Over 100 in one grilling season (I love to grill!). But not just leat... Drinks, Condiments (LOTS of different BBQ sauces), Drinks, Desserts... even specialty items like GRILLED Pizza, and fun shaped Watermelons.  Easy and these ideas will make you the MASTER of your Backyard Domain!

Friday, January 8, 2016

Garlic Parmesan (And a Little Cajun) Bread - 52 Side Dish Recipes

Pin It Now!

Time for another Bread Machine Bread!

I love my bread machine.  I bake a fresh variety of bread almost every week.  I use the machine to do all of the heavy lifting that folks seem to hate about making bread.

Dump the ingredients in...
Set the machine to the "DOUGH" setting...
Let the machine do the Mixing...
Let the machine do the Kneading...
And let the machine do the first rise...

From there, you can shape the dough as you like.

Today I was planning to make some type of dipping bread for a soup (leftover Turkey from Christmas... Makes a great soup... But I digress.

This is a great dipping bread.  Enough flavor that the taste does not get lost in the soup flavors.  A tight enough crumb that the bread does not fall apart or get gummy when dipped.

There are three extra flavors in the bread.  Two forms of garlic (cause I like it twice as much!).  There is trick to getting the garlic paste from fresh garlic... Take the garlic cloves and mash them with the flat of a chef's knife.  Then mince this as fine as you can.  Add a small sprinkle of salt to draw out the liquid in the garlic and repeat the mash with the flat and mince with this glob until you have a paste (2 or 3 more times).  This gets you a powerful Punch of garlic flavor  that really makes the bread sing!

Fresh grated Parmesan will get you a better Parm flavor.  A little salty, nutty extra something/something that shows up in flavor.  This is a great sandwich bread as well as a wonderful dipping dread for my soup...

Stay warm and ENJOY!


 OK... Here's what I did...


Garlic Parmesan
(And a Little Cajun) Bread


Ingredients
  • 1 Cup Plus 3 TBS Water (warm, about 110 degrees)
  • 3-1/4 Cups Bread Flour
  • 1-1/2 TBS Sugar
  • Large Pinch of Salt
  • 1 TBS Butter
  • 1/4 Cup Parmesan Cheese (freshly Grated)
  • 1 TBS Cajun Spice Mix
  • 1 tsp Garlic Powder
  • 3 Cloves Garlic, Mashed, Minced, add a sprinkle of Sea Salt and then smash into a pulp)
  • 1 Package Instant Bread Machine Yeast
Cooking Directions
  1. In the bowl of the bread machine, add all of the ingredients in the order listed..
  2. Set your machine to the "DOUGH" setting and allow the machine to do all of the mixing, kneading and rising. About an hour and a half total.
  3. When the machine is done, Pull the dough from the bowl. Form into the size of a ball. Cut this ball in half, creating 2 pieces. Take those two pieces, Roll these two pieces into a long tube shapes each about 18 inches long (short "Baguette" look)
  4. Preheat oven to 375 degrees.
  5. Lay the loafs on a baking sheet lined with parchment paper.
  6. Cover with a towel and allow a second rise for 30 minutes.
  7. Bake uncovered for 20 minutes.
  8. Serve Warm to room temperature and ENJOY!
This bread makes a fantastic Cheesy Garlic Bread, perfect for dipping in a soup!


*************************************************************************

So,  I am pleased to list this as one of my Growing list of  "52 Ways to Cook Side Dish Recipes"!!!

Sure the meat gets all the glory but real cooks know it's the spread... the specialty Side Dishes that makes a meal rise or fall. Here's a few of my favorite recipes that will help to create that illusive COMPLETE MENU!

LOTS of Potato Sides, Vegetable Sides, Specialty Salads, Bread and MORE!

****************************PINTEREST**************************

Come and find me on Pinterest... Any of my "52 Ways to cook" Boards are worth following.  If you like this post, please take a second and "Pin" this to your own boards... Better yet, if you are part of a foodie group board please take a second and add this post to your group pins... best way to show your Love!

And BTW, if you are not yet part of a group board, drop me an email at Contact@eRecipeCards.com and request to be added to my group board... FAVORITE FOOD BLOGGERS! (be sure to include your pinterest ID when you write)  Once you are added, any pins you add will be seen by 10s of THOUSANDS of followers of the board (and growing daily).

Rules, only 2... 
  1. In order to join you need to start following the group board as well as at least one of my boards.
  2. And you must ONLY pin original sources, posts from food related bloggers only.  If you are a blogger, this is a great way to have thousands of potential readers see your work,  If you are a fan of bloggers, a great way to share your favorites...
    Come and be a part of ... FAVORITE FOOD BLOGGERS! on Pinterest

FMP