Saturday, August 27, 2016

Sweet Root Beer BBQ Sauce in a Crock Pot


Did you catch an earlier post of BBQ Vidalia Candy Sweet Onions?  Basically an amazingly easy (3 ingredients) side dish of slow roasted sweet onions flavored with a BBQ sauce.  I didn't go into details, but the BBQ sauce you see in those onions is this fresh made sauce.

I love making my own BBQ sauce.  So easy to whip something up special for whatever I am grilling.  I have already posted a Sweet/Heat Bourbon BBQ Sauce, with a rich Earthy spiced flavor... Something for the grown-ups.  I also posted my Hawaiian Sweet BBQ Sauce, a more sweet sauce infused with minced bits of Pineapple with just hints of jalapeno that I made to appeal to my wife and the ladies.

And now I am completing the circle with a much more sweet sauce, this Root Beer BBQ Sauce.  And yes, it is indeed made with root beer (always full strength, never cook with diet sodas, too many questionable chemicals that will alter taste).  The root beer cooks down into a thick syrup, infusing even the few bits of Jalapeno with a sweetness that appeals to the kids at your table.

Like the rest of my BBQ sauces, this is very easy.  The main ingredient is plain old ketchup, just a matter of mixing in a few items and allowing them to simmer to the desired thickness.  The sweetness of the sauce was perfect to pair with the Onions.  I also made some sweet ribs with a Root Beer BBQ glaze (will be posting them soon) with this sauce.  As I have said, I am posting my big whoop dee-doo menu from a large Labor Day BBQ... a dozen friends and family (and yes several kids that practically licked the ribs of the sauce) and 10 dishes plus condiments, drinks and desserts.  It is soooo easy to make this and adds so much cache bragging rights when you pull out a jar of home made sauce... Especially when it is as good as this...


 OK... Here's what I did...


Sweet Root Beer BBQ Sauce in a Crock Pot


Ingredients
  • 2 TBS Olive Oil
  • 1 Medium Sweet Onion Like a Vidalia or Candy Sweet, finely chopped
  • 4 tsp Ginger, finely grated and fresh
  • 4 Cloves Garlic, minced
  • 1 TBS Smoked Paprika
  • 1 (12 OZ) Bottle Root Beer (NEVER Diet)
  • BIG Can (109 Ounces) Tomato Sauce
  • 1/2 Cup Brown Sugar
  • 2 TBS Molasses
  • 1 small Jalapeno Pepper (optional) Finely minced, no seeds
  • Juice and Zest of 1 Lemon
  • Several pinches of Salt and Pepper to taste
Cooking Directions
  1. Heat the oil in a medium saucepan over medium heat, add the onions and cook until soft and translucent.
  2. Add the ginger and garlic and cook for 1 minute.
  3. Add the paprika and cook for 1 minute.
  4. Stir in the root beer and cook until reduced by half.
  5. Add the ketchup, brown sugar, molasses and Jalapeno and cook over low heat until the flavors meld and the sauce reduces, stirring occasionally, about 30 minutes.
  6. Add the lemon juice and zest and season with salt and pepper.
  7. Transfer while HOT to sterilized canning jars and allow to cool.
  8. Refrigerate sealed in jars for up to 6 months. Once opened,use within a couple of weeks.
  9. Serve as you would any BBQ sauce over ribs, in Baked beans or whatever and ENJOY

*************************************************************************

So,  I am pleased to list this as one of my Growing list of  "52 Grilling Time Secret Extras" or "52 Ways to Cook BBQ and Grilling Recipes"!!!

Well over 52 recipes actually as I just can't stop... Over 100 in one grilling season (I love to grill!). But not just leat... Drinks, Condiments (LOTS of different BBQ sauces), Drinks, Desserts... even specialty items like GRILLED Pizza, and fun shaped Watermelons.  Easy and these ideas will make you the MASTER of your Backyard Domain!

****************************PINTEREST**************************

Come and find me on Pinterest... Any of my "52 Ways to cook" Boards are worth following.  If you like this post, please take a second and "Pin" this to your own boards... Better yet, if you are part of a foodie group board please take a second and add this post to your group pins... best way to show your Love!

And BTW, if you are not yet part of a group board, drop me an email at Contact@eRecipeCards.com and request to be added to my group board... FAVORITE FOOD BLOGGERS! (be sure to include your pinterest ID when you write)  Once you are added, any pins you add will be seen by 10s of THOUSANDS of followers of the board (and growing daily).

Rules, only 2... 
  1. In order to join you need to start following the group board as well as at least one of my boards.
  2. And you must ONLY pin original sources, posts from food related bloggers only.  If you are a blogger, this is a great way to have thousands of potential readers see your work,  If you are a fan of bloggers, a great way to share your favorites...
    Come and be a part of ... FAVORITE FOOD BLOGGERS! on Pinterest

Wednesday, August 24, 2016

Bloody Mary Deviled Eggs


 OH BOY... Deviled Eggs!

But not just any deviled eggs these have that unique flavor of a classic Bloody Mary Drink...

Tomato juice is replaced with thick tomato paste.  Since the paste is thick you can thin the mix a bit with actual VODKA!  Add traditional flavors like Worcestershire Sauce and Spices (instead of horseradish, I like Old Bay and Cayenne Pepper seasonings but feel free to go with the classic and add a bit of horseradish sauce).

The tomato paste, in addition to adding a rich tomato flavor to the yolk mixins also adds a bit of the rec color of the drink.

And of course a garnish of celery just tops the whole thing off,

LOVED these.  Great fun to make.  Great fun to show off for guests...

I took them to a brunch reception at my church and they went like hot cakes... Better than hot cakes actually as the group left not a single one.  Liked plate clean as a whistle, the ultimate compliment for any pass a plate PotLuck meal.

Keep scrolling down for this easy to follow recipe and ENJOY Indeed!


 OK... Here's what I did...

Bloody Mary
Deviled Eggs

Ingredients
  • 12 Large Eggs, Hard-Boiled and Peeled (I always make at least 14-15 eggs just in case some do not peel well... Then I make Egg Salad from the leftovers)
  • 1/4 Cup Mayonnaise
  • 1/4 Cup Tomato Paste
  • 2 TBS Pepper Vodka
  • 2 TBS Lemon Juice
  • 1 TBS Worcestershire Sauce
  • 1 tsp (to taste) Old Bay Seasoning
  • Pinch each Salt and Pepper 
  • Small Pinch Cayenne Pepper Spice (Can use Red Pepper Flakes.  This is optional depending on how spicy you like your Bloody Marys)
    Celery Leaves and thin slices for garnish
  • Smoked Paprika for Additional garnish.
Cooking Directions
  1. Slice the eggs in half lengthwise, putting the yolks in a medium bowl and the whites on a platter.
  2. Use a fork to mash the yolks and mix in the mayonnaise, Tomato Paste, Vodka, Lemon Juice, Worcestershire Sauce, Old Bay Spice Mix, Salt, Pepper and optional Pepper Spice.  Mix until completely smooth (I prefer to use a food processor).
  3. Place the yolk mixture into a piping bag with a large opening star tip OR into a sturdy resealable plastic bag, push into one corner, and cut off the tip to make a pastry bag. Pipe the yolk mixture into the whites.
  4. Arrange the eggs on a serving dish.  Add the garnish of the Celery slices, additional celery leaves and the smoked Paprika.
  5. Best to serve chilled. ..and of course, ENJOY!

******************************************************

This recipe has been added to my growing list of "52 Church PotLuck Dishes"!

A list of something NEW worthy of being shown off at a neighborhood BYODish (Bring Your Own Dish) Party, a Family special occasion dinner, Any Big Holiday Gathering or of course that glorious day when you bring a dish to share with your Church family...

Ages ago, literally almost a half century ago I was listening to our pastor talking about a PotLuck Dinner. It happened to be scheduled around a church work day when we were expected to weed, polish and do general cleaning and maintenance around the church (you know, back in the day when there were no no-wax floors and church pews smelled of Old English furniture polish). I am of course paraphrasing, but as I recall the pastor said,

"A potluck, like a church requires work. At a potluck everyone is expected to contribute.. At a church no one should come empty handed and no one should leave unfed".
I will confess that in my youth I brought more store bought plastic spoons and forks than I ever brought covered dishes and crock pots of fresh made love and caring delights. But now that I have become a hobbyist cook, I occasionally am reminded of those days and people from my youth. I reminded and I do wish that I could drop a dish of some new creation on those old tables at my fondly remembered Liberty Baptist Church.  Tables covered with newspapers and loaded with God's bounty prepared with love and caring... Enjoy

***********************PINTEREST*********************

Come and find me on Pinterest... Any of my "52 Ways to cook" Boards are worth following.  If you like this post, please take a second and "Pin" this to your own boards... Better yet, if you are part of a foodie group board please take a second and add this post to your group pins... best way to show your Love!

And BTW, if you are not yet part of a group board, drop me an email at Contact@eRecipeCards.com and request to be added to my group board... FAVORITE FOOD BLOGGERS! (be sure to include your pinterest ID when you write)  Once you are added, any pins you add will be seen by 10s of THOUSANDS of followers of the board (and growing daily).

Rules, only 2... 
  1. In order to join you need to start following the group board as well as at least one of my boards.
  2. And you must ONLY pin original sources, posts from food related bloggers only.  If you are a blogger, this is a great way to have thousands of potential readers see your work,  If you are a fan of bloggers, a great way to share your favorites...
    Come and be a part of ... FAVORITE FOOD BLOGGERS! on Pinterest

Tuesday, August 23, 2016

Warm Bacon German Potato Salad


 OH BOY POTATO SALAD!

I love German potato salad.

I make a lot of potato salad during the summer.  Just always seems to go together with back yard BBQs and about any pass a plate get together PotLuck.

I rarely make German style potato salad and I really don;t know why.  Aside from the need to serve this warm (Best warm but OK room temp or even cold... Just better warm).  But, whenever I do make German style I always want more.

German "Kartoffelsalat" is a popular variation that is generally prepared with vinegar, potatoes, salt, pepper, vegetable oil, mustard, vegetable or beef broth, onions and topped with chive. This style of potato salad is usually found in Southern Germany. Potato salad from northern Germany is generally made with mayonnaise and quite similar to its U.S. counterpart.

I especially love this recipe.  Loaded with a tart vinegar taste but also heavy with the mustard flavor that makes this version famous.

Easy and quick to make and LOADED with the unique flavor that makes this famous...

Enjoy indeed!


 OK... Here's what I did...

German Potato Salad

Ingredients
  • 2 Pounds Red Potatoes, Large Dice, Boiled until cooked through, about 10 minutes
  • 6 slices bacon, chopped, cooked to a crispy texture, drained of grease.
  • 4 Cloves garlic. small mince
  • 1 TBS Olive Oil
  • 5 TBS Apple Cider Vinegar
  • 2 TBS Brown Sugar
  • 2 TBS Stone ground Dijon Mustard (With visable Mustard Seeds)
  • Salt and Pepper to taste
  • 5 Green Onions, sliced... Reserve 2 TBS For garnish.
Cooking Directions
  1. In a pot of boiling water add the already diced potatoes and Cook until cooked through... About 10 minutes.  Be careful to not over boil, Red Potatoes turn mushy if over cooked.. Drain and return potatoes to pot.
  2. In a large deep skillet fry bacon over medium-high heat until browned and crisp. Remove the bacon from the pan and set aside.
  3. Add minced garlic to the bacon grease and cook over medium heat until browned, then add olive oil, apple cider vinegar,mustard, brown sugar, salt and pepper to the pan and bring to a boil. Add the potatoes, sliced red onion and bacon. Heat through and transfer to a serving dish.
  4. Transfer to serving dish, serve warm or transfer to the refrigerator and chill to serve cold.
  5. Serve Warm
    ... and ENJOY!

*************************************************************************

Double Click the photo above for a
link to my growing list of
52 Side Dishes
So,  I am pleased to list this as one of my Growing list of  "52 Ways to Cook Side Dish Recipes"!!!

Sure the meat gets all the glory but real cooks know it's the spread... the specialty Side Dishes that makes a meal rise or fall. Here's a few of my favorite recipes that will help to create that illusive COMPLETE MENU!

LOTS of Potato Sides, Vegetable Sides, Specialty Salads, Bread and MORE!

******************************************************

Double click the photo above for a
link to my growing list of HUNDREDS
of recipes suitable for any big
PotLuck meal
This recipe has been added to my growing list of "52 Church PotLuck Dishes"!

A list of something NEW worthy of being shown off at a neighborhood BYODish (Bring Your Own Dish) Party, a Family special occasion dinner, Any Big Holiday Gathering or of course that glorious day when you bring a dish to share with your Church family...

Ages ago, literally almost a half century ago I was listening to our pastor talking about a PotLuck Dinner. It happened to be scheduled around a church work day when we were expected to weed, polish and do general cleaning and maintenance around the church (you know, back in the day when there were no no-wax floors and church pews smelled of Old English furniture polish). I am of course paraphrasing, but as I recall the pastor said,

"A potluck, like a church requires work. At a potluck everyone is expected to contribute.. At a church no one should come empty handed and no one should leave unfed".
I will confess that in my youth I brought more store bought plastic spoons and forks than I ever brought covered dishes and crock pots of fresh made love and caring delights. But now that I have become a hobbyist cook, I occasionally am reminded of those days and people from my youth. I reminded and I do wish that I could drop a dish of some new creation on those old tables at my fondly remembered Liberty Baptist Church.  Tables covered with newspapers and loaded with God's bounty prepared with love and caring... Enjoy

***********************PINTEREST*********************

Come and find me on Pinterest... Any of my "52 Ways to cook" Boards are worth following.  If you like this post, please take a second and "Pin" this to your own boards... Better yet, if you are part of a foodie group board please take a second and add this post to your group pins... best way to show your Love!

And BTW, if you are not yet part of a group board, drop me an email at Contact@eRecipeCards.com and request to be added to my group board... FAVORITE FOOD BLOGGERS! (be sure to include your pinterest ID when you write)  Once you are added, any pins you add will be seen by 10s of THOUSANDS of followers of the board (and growing daily).

Rules, only 2... 
  1. In order to join you need to start following the group board as well as at least one of my boards.
  2. And you must ONLY pin original sources, posts from food related bloggers only.  If you are a blogger, this is a great way to have thousands of potential readers see your work,  If you are a fan of bloggers, a great way to share your favorites...
    Come and be a part of ... FAVORITE FOOD BLOGGERS! on Pinterest

Monday, August 22, 2016

Million Dollar Catering Platter Chicken Salad Wraps and Caprese Salad on a Stick


 On occasion, I am a part time caterer,  An occasional wedding, a few dinner parties.  But mostly I do corporate lunches for 20 to 40 people 3 or 4 times a week.

Just enough to keep me busy and to pay for my personal food bill.

This is indeed my million dollar platter.  It has a wonderful presentation, a delicious flavor and features something for everyone.

The Chicken salad is served in a low carb wrap.  Seems someone is always wanting to avoid bread these days.  It also features lots of fruit and vegetables... Grapes and Apples as well as Celery and onions with pickles to add zing.

Keep scrolling down to take a look at the recipe for the chicken salad.  By far my most requested sandwich.

The Caprese on a stick is so easy, I think you can see the recipe in the photos...

1 basil leaf
1 Cherry tomato
1 Mozzarella "Pearl" ball
1 Fancy toothpick.

About the only difficult thing is to cut an X into the top of the cherry tomato, then stuff the mozzarella ball into the X and skewer with the fancy toothpick.

Repeat.

This is just a handy little idea if you are ever asked to provide a simple lunch for 20-40 people.  The platter will come back empty and your friends/clients will be thrilled!

A Million Dollar Idea indeed!


 OK... here's what I did...


Million Dollar
Chicken Salad Wraps -


Ingredients
  • FOR THE BRINE - 
    6 Large Boneless Skinless
     Chicken Breasts
  • 1 Gallon Water
  • 1 Cup Salt
  • 2/3 Cup Sugar
  • 1/2 Cup Soy Sauce
  • 1/4 Cup Fresh Cracked Pepper Corns 
  • FOR THE CHICKEN SALAD -
    1 Cup
     Mayonnaise
  • 1/2 Cup Ranch Salad Dressing
  • 1 Cup Seedless Grapes, Washed, Sliced in half (or even quarters if the grapes are large)
  • 1 Cup Apples, Core removed, Diced Medium Size
  • 1 Cup Celery, Diced same size as Apples
  • 1 Cup Sweet Onion, Diced same size as Apples
  • 1 Cup Pickles (I like Dill, but can use Sweet Gherkins), Diced same size as Apples
  • 2 TBS Herbes de Provence Spice mix (Can use whatever dry spices you have in the house... Dill is very good)
  • 1 TBS Cajun Spice Mix (Optional but adds a lot of flavor to your salad)
Cooking Directions
  1. First, BRINE YOUR CHICKEN BREASTS... In a large Heavy Bottomed Stew Pot, heat water to simmer. Add the Salt, Sugar, Soy Sauce and Cracked Pepper Corns. Stir to dissolve and allow to simmer for 2 minutes, stir again.
  2. Remove pot from stove and allow to cool to room temperature. Add Additional ice cubes to cool the water more.
  3. Add the Chicken breasts, cover the pot and refrigerate for 4 hours, no longer than 8.
  4. Preheat oven to 350 degrees... When ready to cook, drain the water and rinse the chicken breasts. Pat dry with a paper towel. Rub each chicken breast with a bit of Olive Oil.
  5. Place in a Glass Casserole dish, bake for 35-40 minutes until the internal temperature reaches 165 degrees (NO MORE, but be sure to check each breast). Remove from oven and allow to cool.
  6. While the Chicken is baking, prepare all of your vegetables, slice and dice. In a LARGE BOWL, add everything together and stir to mix.
  7. Once Chicken has cooled, dice the meat to 1/2 inch cubes. Add this to the bowl and stir to mix. Add additional Mayonnaise as needed.
  8. Serve wrapped in Tortillas or on sandwich (Or just use as a dip with a Ritz Cracker). Refrigerate until ready to eat and ENJOY!

Sunday, August 21, 2016

Caribbean Delights 7-UP Cake with Papaya Coconut and Macadamia Nuts


 OH BOY Tropical sweet cake,

Perfect for any HOT Summer day (or cold winter day when you want to be reminded of a Hot Summer Day)!

There are a couple of things about this recipe... First, think of it as a crumble, meaning go nuts when you add the fruit.  that cake works just as well with about any kind of fruit...

Keeping the tropical theme, Mango slices would work perfect.  But change the pineapple cake to an Autumn spice cake and this would be great with Apples!  Cherries... Peaches... Pineapple... Same recipe, different but same terrific texture and a world of possibilities for flavors.

And speaking of terrific flavors, this is a 7-UP Cake, no oil, no extra eggs, no added sugar.  This is a wonderful way to serve up something unique...

But Delicious!

Keep scrolling down for this easy to follow recipe and of course...\

Enjoy Indeed!


 OK... Here's what I did...


Caribbean Delights 7-UP Cake


Ingredients
  • 1 ripe Papaya, skin removed, seeds removed, cut inot 50 cent size thin slices (bite siae)
  • 1 Pineapple Cake Mix (Simple store bought)
  • 1 Can (12 Ounces) 7-Up Lemon Lime Soda
  • 2 Cups Cold Half and Half (Can use Whole Milk)
  • 1 Cup Chopped Macadamia Nuts
  • 1 Cup Shredded Sweetened Coconut
Cooking Directions
  1. Preheat oven to 350 degrees.  Prepare a 9X13 Casserole dish with non-stick spray.
  2. In a large bowl, mix the cake mix with the 7-Up
  3. Peel, Remove the seeds and cut the papaya into bite size pieces.
    NOTE: This recipe works terrific with mangoes, Peaches, Cherries etc... Just about any fruit that makes a good pie
  4. Spread the fruit in the bottom of the pan.
  5. Top the fruit with the cake batter.  Top the batter with a thin layer of the coconut.  Sprinkle the Macadamia Nuts over the coconut.
  6. Bake 40 Minutes or until toothpick can be inserted and comes out clean.
  7. Cool for 20 minutes.
  8. Serve WARM with a glass of Cold Milk and ENJOY!

******************************************************

This simple recipe has been added to my growing list of "52 Cakes and Pies at Home"!

These are the desserts you make for your family.  No fancy amazing wedding cakes, just the rustic beauty of the classics.  From pumpkin pie to cheesecakes to layer cakes, these are what your family craves for dessert.  You may even see a few unusual crusts and frosting ideas to try.

You get the idea. These recipes are simple, delicious and will have your family wanting dessert first...

***********************PINTEREST*********************

Come and find me on Pinterest... Any of my "52 Ways to cook" Boards are worth following.  If you like this post, please take a second and "Pin" this to your own boards... Better yet, if you are part of a foodie group board please take a second and add this post to your group pins... best way to show your Love!

And BTW, if you are not yet part of a group board, drop me an email at Contact@eRecipeCards.com and request to be added to my group board... FAVORITE FOOD BLOGGERS! (be sure to include your pinterest ID when you write)  Once you are added, any pins you add will be seen by 10s of THOUSANDS of followers of the board (and growing daily).

Rules, only 2... 
  1. In order to join you need to start following the group board as well as at least one of my boards.
  2. And you must ONLY pin original sources, posts from food related bloggers only.  If you are a blogger, this is a great way to have thousands of potential readers see your work,  If you are a fan of bloggers, a great way to share your favorites...
    Come and be a part of ... FAVORITE FOOD BLOGGERS! on Pinterest

Saturday, August 20, 2016

Sriracha Spicy HOT BBQ Sauce


OH BOY BBQ SAUCE!!!

But not just any, this sauce, this particular sauce is my GOTO HOT BBQ sauce recipe.  Plenty of heat, Plenty of flavor and plenty of the gravitas that comes from adding Sriracha to the name of anything.

Sriracha Sauce has a very loyal following.  Often called a cult, the Red Rooster sauce is well known.  Often assumed to be Asian it is in fact a California Hot Sauce.  Pretty straight forward ingredients, Chili Peppers, Vinegar, Garlic Sugar and Salt form the paste that has come to be known as Rooster Sauce!

It is simple enough to make into a BBQ Sauce... Tomato sauce, a sweetener (brown sugar), a Vinegar tartness and the Sriracha Heat!

I ;love making this sauce in a crock pot.  Just dump, simmer on low and thicken at the end... I make about 8 pints worth at a time.  Always seem to be gone well within a year.

You will indeed love this sauce too.  Plenty of heat but filled with extra flavors.  Destined to be your GOTO Sauce too!

Enjoy indeed!


 OK... Here's what I did...


Sriracha Spicy HOT
BBQ Sauce


Ingredients
  • BIG Can (109 Ounces) Tomato Sauce
  • 2 Cups Brown Sugar
  • 1/2 Cup Sriracha Hot Sauce
  • 1/4 Cup Soy Sauce
  • 1/4 Cup Teriyaki Sauce
  • 1 TBS Sea Salt
  • 2 TBS Garlic Powder
  • 1/4 Cup Vinegar
  • To Thicken the Sauce -
    Small can (6 Ounces) Tomato Paste
Cooking Directions
  1. This is a dump and let the Slow Cooker do all the work recipe...
  2. In the bowl of a crock pot slow cooker, mix together the first 8 ingredients (All except the tomato paste).  Turn the slow cooker to low and allow to simmer for 8 hours.
  3. After 8 hours, add the tomato paste and blend thoroughly (I use a hand wand mixer)
  4. Transfer while HOT to sterilized canning jars and allow to cool.
  5. Refrigerate sealed in jars for up to 3 months. Once opened,use within a couple of weeks.
    If you need to store longer than 3 months, sterilize in a water bath.  Seal the jars, submerge at completly plus least 1 inch of boiling water and continue to boil foir 15 minutes.  These jars will have a shelf life of a year at room temperature.
  6. Serve as you would any BBQ sauce over ribs, in Baked beans, to dress up chicken or whatever and ENJOY

*************************************************************************

So,  I am pleased to list this as one of my Growing list of  "52 Grilling Time Secret Extras" or "52 Ways to Cook BBQ and Grilling Recipes"!!!

Well over 52 recipes actually as I just can't stop... Over 100 in one grilling season (I love to grill!). But not just leat... Drinks, Condiments (LOTS of different BBQ sauces), Drinks, Desserts... even specialty items like GRILLED Pizza, and fun shaped Watermelons.  Easy and these ideas will make you the MASTER of your Backyard Domain!

****************************PINTEREST**************************

Come and find me on Pinterest... Any of my "52 Ways to cook" Boards are worth following.  If you like this post, please take a second and "Pin" this to your own boards... Better yet, if you are part of a foodie group board please take a second and add this post to your group pins... best way to show your Love!

And BTW, if you are not yet part of a group board, drop me an email at Contact@eRecipeCards.com and request to be added to my group board... FAVORITE FOOD BLOGGERS! (be sure to include your pinterest ID when you write)  Once you are added, any pins you add will be seen by 10s of THOUSANDS of followers of the board (and growing daily).

Rules, only 2... 
  1. In order to join you need to start following the group board as well as at least one of my boards.
  2. And you must ONLY pin original sources, posts from food related bloggers only.  If you are a blogger, this is a great way to have thousands of potential readers see your work,  If you are a fan of bloggers, a great way to share your favorites...
    Come and be a part of ... FAVORITE FOOD BLOGGERS! on Pinterest

Friday, August 19, 2016

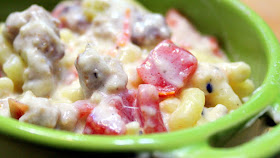
The Basics - Simple Mac and Cheese with Sausage


 OH BOY MAC AND CHEESE!

And this one is special.  Here is the basic, easy scratch version of mac and cheese.  I did dress it up with a little sausage (Love those tubes of sausage... look for the sales and you can get them for as low as $1 for 1 pound).  I also added a can of tomatoes for a little extra zing.

But the basic mac and cheese recipe is in here.

First, make a roux... A thickener for the creamy-ness.  Melted butter and an equal part of flour.  Mix this for awhile (Stir A LOT to prevent burning the flour).  Then start adding.   Milk to thin and cheese to melt.  Add the pasta a bing bang boom... You have Mac and Cheese.

From there you can personalize, add spices, Hot as you like or savory.

Add some meat... Those tubes of sausage work great but a pound of hamburger works to.

If you like, add some veggies like broccoli florets.

one you master the basics, the world is your Oyster... Hmmm... Oyster Mac and Cheese... Why not!


 OK... Here's what I did...


The Basics - Simple
Mac and Cheese
With Sausage and Tomatoes


Ingredients
  • 1 Pound Elbow Macaroni Cooked according to package directions.
  • 4 TBS (1/2 Stick) Butter
  • 1/3 Cup All Purpose Flour
  • 1 Large Onion, Chopped
  • Finely Ground Black Pepper (To Taste)
  • 6 Cups Milk
  • 1-3/4 Cups Shredded Combination Colby and Cheddar Jack Cheese
  • 1 tube Sausage
  • 1 Cup Diced  Tomatoes (I use canned chopped tomatoes)
Cooking Directions
  1. Heat butter in a medium saucepan over medium-lowheat. Stir in the onion, 2-1/2 tsp salt and a couple of turns of pepper and cook, stir in the flour until combined.  Stir constantly until golden and a nutty aroma forms, about 5 minutes. 
  2. Whisk in the milk and bring to a simmer.
  3. Start the pasta and cook according to the package directions, EXCEPT, cook 1 minute less for Al Dente texture. The pasta will finish cooking in the sauce during baking. Drain when time is up, return drained pasta to large pasta pot.
  4. Back to the sauce, while the pasta is cooking, Brown the Sausage and break up into small pieces.
  5. And while the sausage is browning, Stir the cheese into the liquid, remove from heat and transfer sauce to the pasta pot with the drained pasta and also add the sausage and tomatoes. Stir to evenly mix.
  6. Transfer the pasta to a large 3-1/2 quart serving dish.
  7. Serve Hot and ENJOY!