Tuesday, February 14, 2012

a Sea of Molten Lava Chocolate in a Volcano Cake Cup

Pin It Now!

One last Valentine's Day Idea, but first, here's a quick recap of a couple of VERY easy (yet dramatic looking) V-D ideas...

Tuxedo
Clad
Chocolate
Covered
Strawberries!


OK, back to the deep rich Dark Chocolate Pudding nestled into that adorable little Chocolate Cake cup...

Shhh... This is a Julia Child, "Who's to Know" moment.  The presentation was supposed to be a Lava Cake.  You've probably seen them, little cakes, served warm.  When you slice into them the chocolate pours out like lava.  Fun, easy, dramatic and delicious!  The pudding is hot, the cake provides texture and the taste is deep rich and wonderful.

Well... Best laid plans and all that, my little cakes lost their tops when I tried to make the presentation.  The bottom of the cake (well top after you flip em) stuck to the bottom of my bowls, exposing my sea of chocolate.

I was bummed, irritated, pissed and greatly disappointed.  These were to be the capping dessert to a dinner party and I was looking forward to the dramatic lava cakes.

But then I looked at em...


If I ignored the idea of "What I wanted them to look like" and pondered what I actually had... They were PERFECT!

A sea of rich thick warm chocolate pudding (the Lava) resting comfortably inside the chocolaty volcano mountain.  No dramatic pouring out of the lava, but the entire volcano presentation.

I grew from having to live with it to actually loving this.  Easily converted to a Lava Cake, just be sure to spray the bottom of the bowls with non stick spray.  Easily one of my "Top Five" desserts!

Oh, and the presentation with the fork negative image in powdered sugar is very easy.  Only slight trick is to sprinkle small amounts at a time over a fork and carefully lifting the fork off the plate without disturbing the sugar.  Several small sprinkles instead of many large clumps.

OK... here's what I did...

4 ounces Baker's Semi-Sweet Chocolate
1 Cup Confectioner's Sugar (more for decoration)
2 whole Eggs
2 Egg Yolks
6 TBS Flour

DO NOT SPRAY THE BOTTOM OF A Mise en Place BOWL.  This way, the bottom of the bowl will force the chocolate cake to stick.  If you want the cakes to come out like traditional Lava Cakes, be sure to spray the bowls.
  • Heat oven to 425 degrees
  • Melt Chocolate squares and butter in the microwave on high for 1 minute, stir to combine (Add additional 15 second bursts if needed).
  • Stir in sugar and slowly add eggs and egg yolks and flour, stir until well mixed.
  • Pour into 4 1/2 cup Ramekins (I use the small Mise en Place Bowls).
  • Bake for 12 minutes until the sides are firm.  Allow to rest for 1 minute, use a knife edge and loosen around the sides.
  • Carefully invert onto a plate.  If need be, remove bits of the top to make an even mountains.  Serve warm!
Printable recipe...
For the time being...

Click the image to the left for a printable copy of this recipe. When the large image appears, right click the image and select "Copy Image". Then open a word document file, click paste and print. Prints on an 8 1/2 by 11 sheet of paper.

Soon, it will become a PDF file that you simply have to click and print.

Sunday, February 12, 2012

Tuxedo Clad Chocolate Covered Strawberries

Pin It Now!

HAPPY VALENTINE's DAY!

OOOOO... AAAAAAA... Give me 5 bucks.

That's the going rate for one of these little jewels.  Or just make a whole bunch for under $10 and they are MUCH easier than you would think.

About the only thing you might need is a small piping bag with a small tip to make the buttons and bow tie.  But actually, you can do the same thing with just a toothpick dipped in the chocolate.  Other than that, I temper my chocolate in a microwave, use the greens on the strawberries to hold onto them and a glass bowl to melt the chocolate in.

The "value" of these is more in the look and romance of the term, "Chocolate Covered Strawberries".  so really you can get just about the same effect if you use a regular Hersey Bar  for the chocolates.  Of course, if you are making these for a chocolate snob, you may want to spend a little more and get the good stuff.

Me, I compromised and bought 3 Ghiradelli chocolate bars.  They worked great for these.

3 bars at $2 each, a Box of a dozen strawberries on sale for $2.50.  Total cost for a dozen chocolate covered strawberries... $8.50... About 75 cents each!!!

A few tricks, first and most important, Temper your chocolate.  Chocolate is an emulsion.  Meaning it is a combination of ingredients that do not mix well.  Fortunately, if the chocolate you buy is kept under 90 degrees, the chocolate will melt without the butter fat separating.  If you have ever worked with chocolate and had a little pool of butter form around the edges, this is why.

Here's my illustrated tempering chocolate 101 tips...

TIP #1

Divide your chocolate into separate 1/4 of the chocolate you are going to melt.


Tip #2

Melt 3/4ths pf your chocolate slowly.  I prefer to melt mine in a microwave, bit if you go old school and melt in a double boiler, just be sure to NOT boil the water.  Ideally you will heat the chocolate to only @85 degrees or  slightly cooler.  I just break up my squares into a microwave safe bowl.  Set the timer to 30 seconds and the power level to 50% and stir.  Repeat until the chocolate is completely melted but not HOT.  the bowl will feel a tad warm, but never hot to the touch.


Tip #3

Chop the remaining 1/4 of the chocolate into small fine pieces.  Smaller the better.  The residual heat in the microwaved chocolate will melt the remaining amount.  It also cools the chocolate down a bit so that it will easily harden or set quickly when you start working.  Just stir in the remaining chocolate bits and keep stiring until the chocolate is melted.  It will feel noticeable thicker than the chocolate from the microwave.  It sets up pretty quick, so you will want to be ready to work.  If need be, a couple of seconds in the microwave (50% power) will soften the chocolate up.


OK, now that we have tempered chocolate, we are ready to work.  First thing is to make the white shirt of the tuxedo.  You do not need to coat the entire strawberry, just the front section.  Look closely at the photo below and you will see what I mean.


Before you dip the strawberries, it is important to dry them with a paper towel before dipping.

Also, there are a few people who like white chocolate, so I always dip a few all the way  and do not use any dark chocolate on them.  You can decorate those with just a quick flick of some melted chocolate on fork tips.  Or wait until you have the dark chocolate melted and flick a few lines of the other color...


And next, it's time to add the chocolate jacket to your tuxedo...

Once you have all of the white finished, temper the dark chocolate in the same way you did the white.

Not much trick, just be careful of how much white you cover up.  The white is the front, so dip the back of the strawberry first,  Angle the berry and roll to form a lapel over the white.  Then roll to the other side for the lapels.  They should form a V of white, surrounded by the dark.  You will also get nice straight lines.


If you have your chocolate tempered properly, the chocolate will set up pretty quick.  I hold mine for about a minute before resting them on parchment paper.  This way the strawberries have a hard crisp shell formed before I set them down.  This prevents the amateur looking glob of melted chocolate from forming after you set them down.

"I am only one man", meaning I was not able to photograph the button and bow tie accents while i was making these.  The chocolate can be added with a small piping bag and tip, or just as easily added a dot at a time with a toothpick.  It's easy, don't worry.


These are best if eaten within a day of when they are made.  Otherwise the strawberries start to shrink up inside and get mushy.


My white chocolate was stiffening up as I did the last one, but I thought it reminded me of my High School Prom with my ruffled shirt (back when disco was king!).

But i was able to get a nice plate full for my wife.  A few different looks for Chocolate Covered Strawberries... Each one under a dollar!

And always more appreciated when the love of your life knows they were hand made just for her!

Friday, February 10, 2012

EASY DELICIOUS Cold Doritos Corn Salad - 52 Side Dish Recipes

Pin It Now!

This dish has an odd little history...

Under the category of everything old is new again... Small town funeral food.

My wife's beloved aunt passed away a few weeks ago.  We attended the services along with nearly a hundred of Aunt Dorothy's Kids, Grand Kids, Great Grand kids, Nieces, Nephews and various lesser relatives (and in-laws) along with several hundred of the towns 2,000 residents.  Much beloved indeed.

And of course when you say much beloved in a small town, you get the "pot luck" funeral church basement meal.

Well, I found me a "new" dish that is decades old.  New, but has certainly moved into one of my "Top Five" Vegetable or Side dishes!


I am sure I will be revisiting this dish come summer grilling season.  After all, it is served cold.  I generally have most of the ingredients on hand (except the chips, but the gas station on the corner has those).  It works just as well as a dip as a side dish, and bottom line... just plain DELICIOUS!

It was the stand out of the pot luck for me, so you know it must be good!

I chose to use the "Spicy Nacho" version of Doritos.  When I tasted the dish, it was flavored with the Taco version.  Either one was excellent!  If you are worried about too much spice, maybe a version of this with the "Sour Cream and Onion" style.


So, Here's what I did...

Ingredients:

2 Cans of Sweet Corn, drained
2 cups Cheddar Cheese, grated
1/2 cup Mayonnaise
1/2 cup Ranch Dressing
1 medium Red Bell Pepper, diced
1/2 medium Red Onion, diced
1 bag (10 1/2 ounces) "Spicy Nacho" Doritos Corn Chips, divided

Mix everything together except the corn chips.
separate about 1/4th of the chips to use as a garnish
The other 3/4 bag crush coarsely and mix with the corn and mixings
Serve and enjoy!

Printable recipe...
For the time being...

Click the image to the left for a printable copy of this recipe. When the large image appears, right click the image and select "Copy Image". Then open a word document file, click paste and print. Prints on an 8 1/2 by 11 sheet of paper.

Soon, it will become a PDF file that you simply have to click and print.

Thursday, February 9, 2012

Cappuccino Jordan Almond Truffles thanks to Oh Nuts!

Pin It Now!

OK, couple of things before I get started.  This is my first Chocolate post since making a "Personal New Year's Resolution" to become an amateur Chocolatier.  While that post is nearly 6 weeks old, I have been hesitant to make a post.  I am in the middle of a learning curve, and my chocolates are MUCH better than they were, some are even very close to chocolatier level, I am still holding off on sharing the results.

Click the Photo to be taken to the order
Page featuring Jordan Almonds
However, just a few days ago I was contacted by the very nice folks at OH NUTS! asking if I would be interested in a freebie!  Duh!  They offered me a pound of their coated Jordan Almonds (my choice)!  They were also interested to see what I would do with them.  I decided to show off a truffle!

First, a bit about OH NUTS!.  They have an outstanding selection of nuts, candies and related gifts.  Their prices are very reasonable (a pound of coated almonds sells for just $6.99).  Of course, with any mail order company, shipping costs can be an issue.  BUT, head to THIS PAGE and sign up for their "email specials" newsletter.  At least once a month and always close to any holiday I get an offer for free shipping.


Some of you may recall a post of "Mini Chocolate Pecan Pies" that I made in December.  Those were also made with Oh NUTS! pecans.  I think their pecans and walnuts, in addition to being just a tad cheaper than my grocery store, are the best quality I have ever used.  Always HUGE, always arriving well packaged with just a minimum of breakage so that you can make those decorative dishes...

Even though I am lucky enough to be on their occasional "Freebie" list, In my opinion, it just does not get any better.  Shipping is fast (and free with their monthly newsletter), price is cheaper than local sources, quality is better than excellent and they are a friend to bloggers (something we should acknowledge, respect and be grateful for).


OK.. Now, on to the truffle...

First, let's talk about what I got.  I ordered a pound of Cappuccino Jordan Almonds.

Thanks to Wikipedia, here's more than you probably wanted to know about JORDAN ALMONDS...
Jordan almonds, also known as sugared almonds or confetti, are a type of confectionery consisting of almonds covered with a candy coating in various colors, originating from Italy and particularly typical of the town of Sulmona. The term "Jordan" in "Jordan Almond" (according to Webster's New International Dictionary) is a corrupted version of the French word "jardin," meaning "garden," "hence, a cultivated almond". Thus they do not come from Jordan; they are thought to come from Malaga, Spain.  Another source of information has it that at one time the term referred to a variety of almonds originally grown along the Jordan River characterized by long, thin, slender, rather smooth kernels in thick, heavy shells.

A classic form of dragée, they are often used as wedding favors because of the "bitter" almonds and the "sweet" sugar representing bittersweet married life.  The treats are often packaged in groups of five per guest, accompanied by a traditional poem:
Five sugared almonds for each guest to eat
To remind us that life is both bitter and sweet.
Five wishes for the new husband and wife --
Health, wealth, happiness, children, and a long life!

Jordan almonds commonly come in pastel, spring-themed colors such as lilac, pale yellow, light blue, light green, and white. The colors are traditionally associated with certain life events, such as white Jordan almonds for weddings, red Jordan almonds for graduations and yellow, pink or blue Jordan almonds for baby showers or baptisms.
My Cappuccino Almonds indeed came with a hard sugar candy shell.  The candy was flavored like the frothy foam that is on the top of a cup of cappuccino.  First thing I did was to break one in half and see what I was dealing with.  The almonds were HUGE!  the coating was too hard to leave "as is" for what i had in mind.

But, once I pulverized a few (hammer or food processor), I was very happy with the consistency.

The tiny pieces were just right.  Crunchy but not teeth shattering.  I knew that mixing these with chocolate would add a touch of crunch and that foamy taste associated with cappuccino.

But I also wanted to add a bit more of the espresso taste associated with cappuccino.  the almonds had just a tiny hint, but I wanted to up the ante.

From reading The Mystery Lover's Kitchen Blog, and specifically the writings of Cleo Coyles' contributions (Cleo is author of the most excellent "Coffee House Mystery" series), I know that adding a tsp of instant coffee to coffee punches up the cocoa bean taste and adds a hint of coffee flavor!


So now, finally, we are ready to make the truffles...

OK, truffles are a combination of heavy cream (no, do not try this with 2% or even whole milk, just not the same) and chocolate.  To further enhance the idea of a cuppuccino, I added a dash of cinnamon to the chocolate.  And finally I added the instant coffee (mixed with a tsp of HOT water).

As to technique tips...

  • DO NOT BOIL THE CREAM.  You want it warm, about 110 degrees, then off the stove.
  • Chop your chocolate into tiny bits before adding to the cream.
  • Add Chocolate slowly and whisk along the way.  You are creating an emulsification.  If you do not get the ganache totally emulsified the fats will separate and make an ugly chocolate.  You probably can not whisk enough.
  • The levels of cream to chocolate determines how hard the final truffle will be.  Use too much cream and the treat will be too soft.  Too little cream and the treat is too hard.  Have extra chocolate available if you determine you need more.
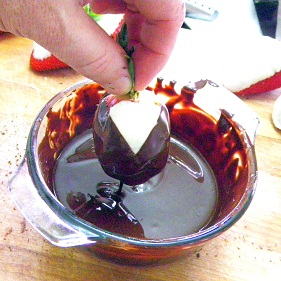
Alright, tough to tell from this photo, but I mixed my cream, my chocolate, added my coffee and cinnamon.  Next I mixed in about 1/3rd of the pulverized cappuccino Jordan Almonds.  This way I got a tiny bit of the crunch throughout.  I also got the flavors of the coating mixed with the chocolate.

Once you have the chocolate emulsified with the cream, added your mixings, you just need to let the chocolate cool.  I let mine sit for about 2 hours.  It reaches room temperature and becomes more of a soft solid than a hard liquid (no longer stir-able).

From there, take a teaspoon, form a ball and roll in the remaining pulverized Cappuccino Jordan Almonds!


Chocolate, hints of coffee, cinnamon and the candy foam of a sweetened cappuccino.  Soft chocolate center with a coating of crunchy nutty almonds (although the almond is actually a seed, but saying the crunchy seedy almond just does not sound right... But I digress).

DELICIOUS!

Recipe:

1 cup OH NUTS! brand Cappuccino Almonds, pulverized into tiny pieces (hammer or in a food processor)
1 tsp HOT Water
1 tsp Instant Coffee
1 tsp Ground Cinnamon
1/3rd cup Heavy Cream
6 ounces 80% Cocoa Chocolate, Chopped

  1. Mix the water and instant coffee
  2. Add the Cinnamon to the coffee
  3. Heat the Heavy Cream to @110 degrees, remove from heat
  4. Add the chocolate about 1/4 of the amount at a time.  Stir constantly and be sure the chocolate is completely melted before adding any more.
  5. Add about 1/3rd of the pulverized Cappuccino Almonds to the chocolate and continue stirring
  6. Allow the chocolate to cool to room temperature.  If done correctly, the chocolate is pliable like play dough.
  7. Form into 1/2 inch balls
  8. Roll in remaining pulverized Cappuccino Almonds
  9. Made about 30 Truffles!

Printable recipe...
For the time being...

Click the image to the left for a printable copy of this recipe. When the large image appears, right click the image and select "Copy Image". Then open a word document file, click paste and print. Prints on an 8 1/2 by 11 sheet of paper.

Soon, it will become a PDF file that you simply have to click and print.

I love these...
I love Almonds...
I love Chocolate...
I love bits of candied almonds rolled in sweetened chocolate!

 A very simple recipe perfect for using up dribs and drabs of Easter candy or Italian wedding guest favors and creating something fun!

Uniquely Delicious!

*************************************************************************

So,  I am pleased to list this as one of my Growing list of  "52 Ways to Cook COOKIE, BARS and TRUFFLES"!!!

Old school like classic criss cross peanut butter to new takes on interesting recipes like a beautiful Red Velvet with the cream cheese mixed inside the cookie, accented with white chocolate chips!  Even a Pineapple Cream Cheese EASY Bar with only 5 ingredients! 
Stop on by, there's always a new cookie in the cookie jar!

****************************PINTEREST**************************

Come and find me on Pinterest... Any of my "52 Ways to cook" Boards are worth following.  If you like this post, please take a second and "Pin" this to your own boards... Better yet, if you are part of a foodie group board please take a second and add this post to your group pins... best way to show your Love!

And BTW, if you are not yet part of a group board, drop me an email at Contact@eRecipeCards.com and request to be added to my group board... FAVORITE FOOD BLOGGERS! (be sure to include your pinterest ID when you write)  Once you are added, any pins you add will be seen by 10s of THOUSANDS of followers of the board (and growing daily).

Rules, only 2... 
  1. In order to join you need to start following the group board as well as at least one of my boards.
  2. And you must ONLY pin original sources, posts from food related bloggers only.  If you are a blogger, this is a great way to have thousands of potential readers see your work,  If you are a fan of bloggers, a great way to share your favorites...
    Come and be a part of ... FAVORITE FOOD BLOGGERS! on Pinterest

Monday, February 6, 2012

Heart Shaped Pizza with Heart shaped Pepperoni

Pin It Now!

If you need advice on making Home made... Dough or sauce or details about cooking time, temperature or any of the basics, take a look at PIZZA 101 (click the blue letters).

But here are the details for the Heart Shaped Pepperoni...

For Valentine's Day...

Keep scrolling down to see the EASY way to make heart shaped pepperoni...


Just that easy!


FMP